Localization
Introduction
In this section, we will investigate the testing of a localized Weather sample. Localization is the process of adapting an application to meet the language, cultural, and other requirements of a specific target market. The ability to support multiple languages in your application can make it more accessible and user-friendly for a global audience.
Example: Localization
Lets look at an example of localization of a Power App
NOTES:
- If the value does not match the test will return “One or more errors occurred. (Exception has been thrown by the target of an invocation.)”
- Reload the page to reset the sample to the default state
Want to explore more concepts examples checkout the Learning Playground to explore related testing concepts
Pre-requisites
To complete this module you will need to follow instructions for setting up in Regional and language options for your environment.
This section assumes that French (LCID 1039) and German language (LCID 1031) have been enabled.
The Need for Localization
Localization is essential for several reasons:
- User Experience: Providing content in the user’s native language enhances their experience and makes the application more intuitive.
- Market Reach: Localizing your application allows you to reach a broader audience and tap into new markets.
- Compliance: In some regions, providing content in the local language is a legal requirement.
Testing Localized Applications
When testing localized applications, it is important to ensure that all elements of the application are correctly translated and formatted. This includes text, dates, numbers, and other locale-specific content. Additionally, you should verify that the application behaves as expected in different languages and regions.
Power Platform Localization
The Power Platform provides robust support for localization in both Canvas and Model-Driven Applications. You can find detailed information on how to localize your Power Apps applications in the following resources:
- Translate text for model-driven apps
- Build a multi-language app
- Add Localized Titles for Navigation Groups
- Microsoft Dataverse language collations
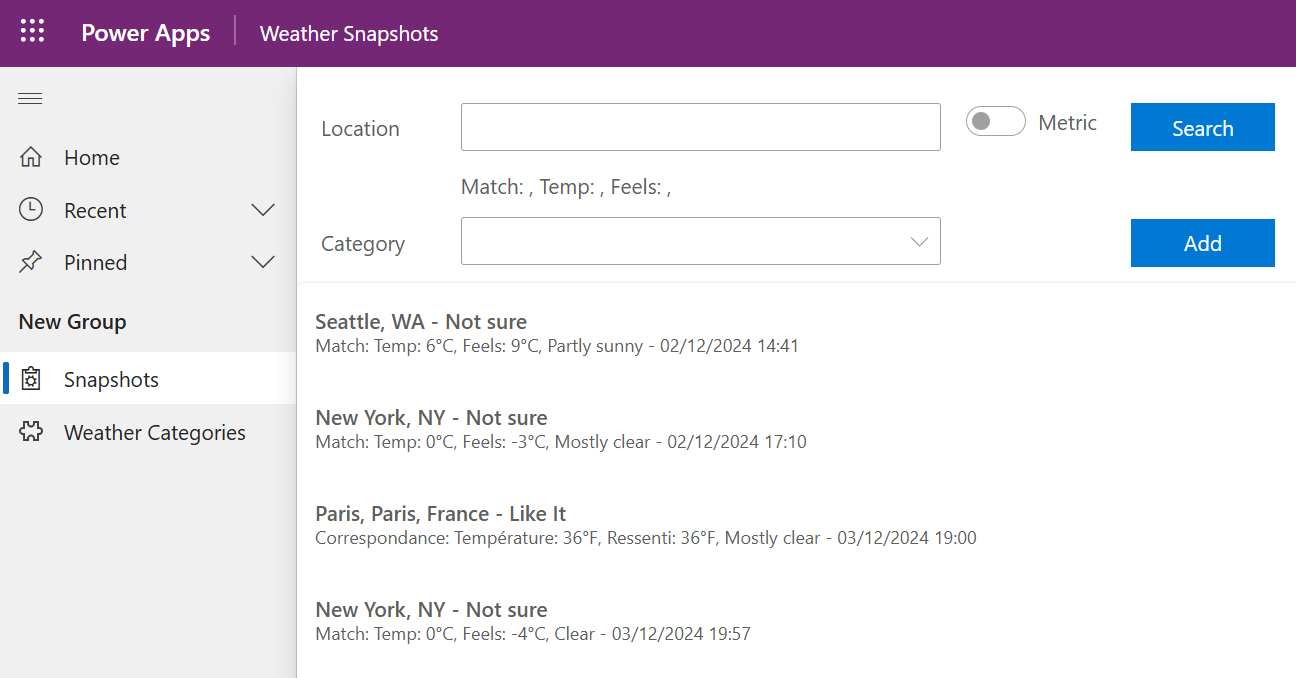
Example: Localizing the Weather Sample
To explore different languages using the Weather sample, follow these steps to expand from English Version

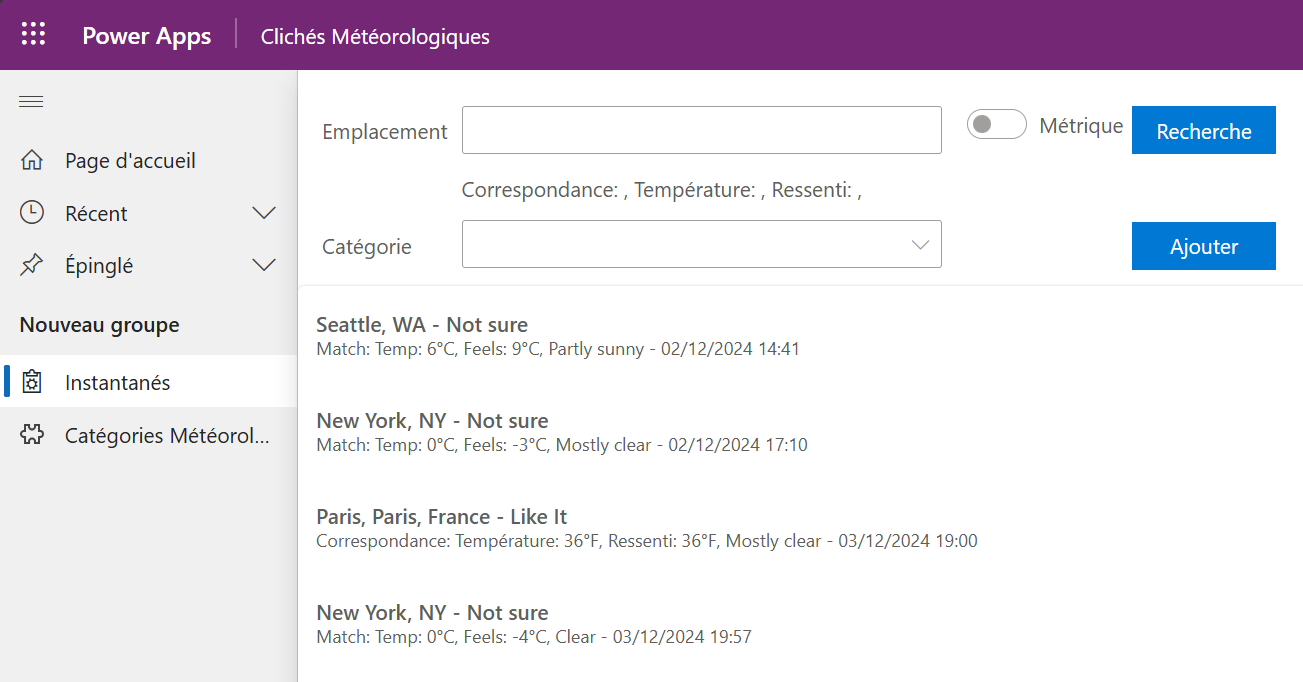
And French version

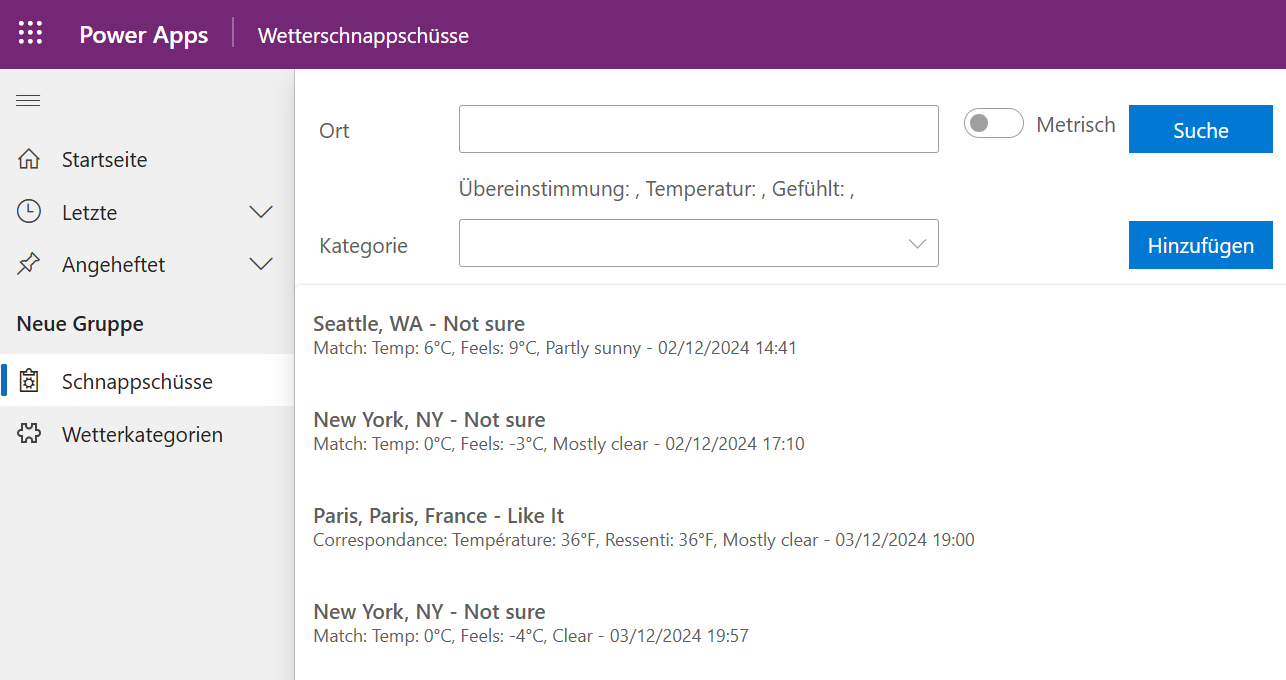
To include German version of the same application

Step 1: Start the Application
Start the Weather Application imported in Using Simulations using the Power Apps Portal.
Step 2: Manually change Personal Settings
To change the user interface language, follow these steps:
- Open the Power Apps portal.
- Navigate to Settings (gear icon) > Languages.
- Under User Interface Language, select French.
- Save the changes and refresh the application.
Step 3: Verify Language Change
The controls of the custom page should change using the Language() Power Fx function. For example, the labels and buttons should now display in French.
Step 4: Automate Language Change with Repost.ps1
The Record.ps1 file makes use of the Dataverse API to update the usersettingscollection and automate the process of changing the UI language. This script can be used to switch between languages programmatically.
To record tests in English and French
-
Open PowerShell session
-
Change to weather sample
cd examples\weather
- Execute record sample
.\Record.ps1
Step 5: Expand to Another Language
Expanding the Model Driven application that contains a custom page and navigation to add a new language includes the applying these sets of changes for the WeatherSample application:
- Updating the translations to the Model Driven application. This will update the Display names of the Dataverse tables.
- Updating the locale settings for thr navigation mention to include new translation
- Updating the Power Fx of the Power Fx Language Component to include the new language
Lets step through each of these changes.
Model Driven Application Changes
The general process to expand the example to another language, such as German (LCID 1031), follow these steps:
- Export the translations and add a new column for German (1031). The Translate customized table, form, and column text into other languages
- Update the translation file with the German translations. For this sample we have included the necessary German translations in the sample folder
- In your file explorer zip the two files named [Content_Types].xml and CrmTranslations.xml into a zip file. For example CrmTranslations.zip
- Open your WeatherSample solution in the maker portal.
- Select the … icon
- Select Switch to Classic
- From the menu select Translations
- Select Import Translations
- Select Choose File
- Select the zip file you created above
- Select Import
Model Driven Application Navigation Changes
Next we will update the localized version of the custom page using the following steps:
- Open your WeatherSample solution in the maker portal.
- Select Apps
- Edit the
Weather SnapshotsModel-Driven Application - Select the Snapshots custom page navigation item
- Expand the Advanced Settings
- Expand the Locale section
- Select Add localized title
- Select the Locale (LCID) German _Germany (1031)
- Add the Localized title Schnappschüsse
- Select Apply
- Select the Publish from the top menu to save the changes to the Model Driven Application to apply group name changes.
Component Library Changes
Finally we will update the Component library to include translations used by the custom page.
-
Open your WeatherSample solution in the maker portal.
-
Select Component libraries
-
Select Localization`** from solution Component libraries
-
Edit the Localization item
-
Edit the Translation Component to update the components
-
Select the Labels property and update the Power Fx to add “de-de” translation. For example the original Labels could look like
LookUp(Table( { Language: "en-us", Labels: { LocationLabel: "Location", Category: "Category", MetricLabel: "Metric", ImperialLabel: "Imperial", SearchLabel: "Search", AddLabel: "Add", MatchLabel: "Match: ", TempLabel: "Temp: ", FeelsLabel: "Feels: " } }, { Language: "fr-fr", Labels: { LocationLabel: "Emplacement", Category: "Catégorie", MetricLabel: "Métrique", ImperialLabel: "Impérial", SearchLabel: "Recherche", AddLabel: "Ajouter", MatchLabel: "Correspondance: ", TempLabel: "Température: ", FeelsLabel: "Ressenti: " } } ),Language = Lower( Language() )).Labels -
After applying changes new translations could look like
LookUp( Table( { Language: "en-us", Labels: { LocationLabel: "Location", Category: "Category", MetricLabel: "Metric", ImperialLabel: "Imperial", SearchLabel: "Search", AddLabel: "Add", MatchLabel: "Match: ", TempLabel: "Temp: ", FeelsLabel: "Feels: " } }, { Language: "fr-fr", Labels: { LocationLabel: "Emplacement", Category: "Catégorie", MetricLabel: "Métrique", ImperialLabel: "Impérial", SearchLabel: "Recherche", AddLabel: "Ajouter", MatchLabel: "Correspondance: ", TempLabel: "Température: ", FeelsLabel: "Ressenti: " } }, { Language: "de-de", Labels: { LocationLabel: "Ort", Category: "Kategorie", MetricLabel: "Metrisch", ImperialLabel: "Imperial", SearchLabel: "Suche", AddLabel: "Hinzufügen", MatchLabel: "Übereinstimmung: ", TempLabel: "Temperatur: ", FeelsLabel: "Gefühlt: " } } ), Language = Lower(Language()) ).Labels - Publish the update components.
- Select the
Snapshotscustom page from pages of the solution - Select Edit for the Snapshots custom page
- After the page of the model driven application opens, review the change and confirm update and refresh the page with the new published component.
- Save the changes to the custom page
- Publish the new version of the custom page
Once you have completed these changes you should be able to use English, French and German translations of the Weather Application.
Testing you Changes
-
Verify that the config file in the samples\weather has been configured for your environment, tennant and user1Email
{ "tenantId": "a222222-1111-2222-3333-444455556666", "environmentId": "12345678-1111-2222-3333-444455556666", "customPage": "te_snapshots_24d69", "appDescription": "Weather Sample", "user1Email": "test@contoso.onmicrosoft.com", "runInstall": true, "installPlaywright": true, "languages": [ {"id":1031, "name": "de-de", "file":"testPlan.eu.fx.yaml"}, {"id":1033, "name": "en-us", "file":"testPlan.fx.yaml"}, {"id":1036, "name": "fr-fr", "file":"testPlan.eu.fx.yaml"} ] } -
You have authenticated with the Power Platform CLI
pac auth create -name Dev --environment 12345678-1111-2222-3333-444455556666 -
You have logged into the Azure CLI with account that has access to the environment that you have deployed
az login --allow-no-subscriptions -
Run the test
 cd samples\weather
 pwsh -File RunTests.ps1
Investigating Key Concepts
Lets investigate some key concepts that are important in this localizaed test.
Power Fx to Set User Settings
Power Fx is a powerful formula language used in Power Apps to manipulate data and control app behavior. When setting user settings, especially for localization, Power Fx can be used to dynamically adjust the user interface based on the user’s language preferences.
Argument Delimiters in Non-English European Languages
In non-English European languages, the semicolon (;) is used instead of the comma (,) to delimit arguments in Power Fx functions. This means that when chaining multiple Power Fx functions, you should use ;; as the separator.
Language() Function
The Language() function in Power Fx returns the language tag of the current user’s language. This function is essential for creating conditional logic based on the user’s language. For example, you can use the Language() function to display different text based on the user’s language setting.
Example: Conditional Language Testing
To make the expected test conditional on the language being tested, you can use the Assert function along with Switch and Language() functions. Here is an example:
Assert(Summary.Text=
    Switch(
        Lower(Language());
        "en-us"; "Match: Test Location, Temp: 30^F, Feels: 20^F, Sunny";
        "fr-fr"; "Correspondance: Test Location, Température: 30^F, Ressenti: 20^F, Sunny";
        "de-de"; "Übereinstimmung: Test Location, Temperatur: 30^F, Gefühlt: 20^F, Sunny"
    )
)
In this example, the Switch function checks the user’s language and validated the appropriate text for English (US), French (France), and German (Germany). The Assert function ensures that the Summary.Text matches the expected value based on the user’s language.
Summary
In this section, you learned about the importance of localization and how to test a localized Weather sample. Localization can be crucial for enhancing user experience, expanding market reach, and complying with regional requirements. The Power Platform provides robust support for localization in both Canvas and Model-Driven Applications.
You explored how to start the Weather application, change personal settings to switch the user interface language, and verify the language change using the Language() Power Fx function. Additionally, you learned how to automate the language change process using the Repost.ps1 script and the Dataverse API.
To expand the example to another language, such as German, you followed steps to export translations, update the translation file, and import the translations. You also learned how to update the navigation group settings and component library to include the new language.
By following these steps, you can ensure and validate that your Power Apps application supports multiple languages, making it more accessible and user-friendly for a global audience.